Ok... trying to nail down how I'm going to do the floors in the buggy..
Option 1:
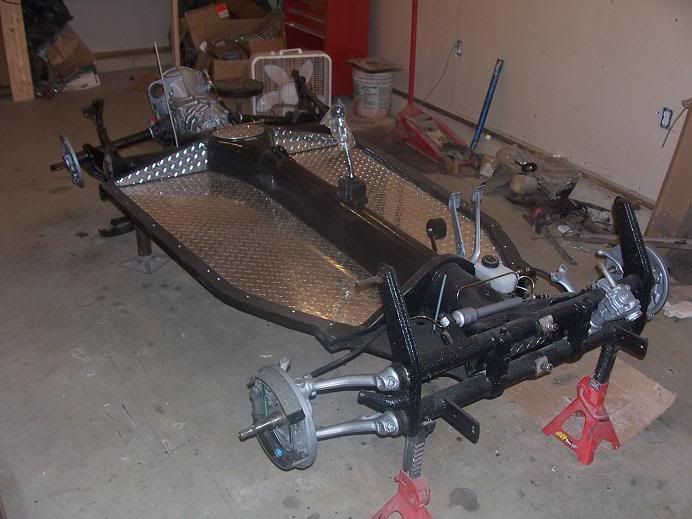
1"x2" perimeter tubing with the floor made from 16Ga sheet. Then three braces (one near the front, two near the back for the seat mount) on each side from tunnel to perimeter using the extra tubing
Option 2:
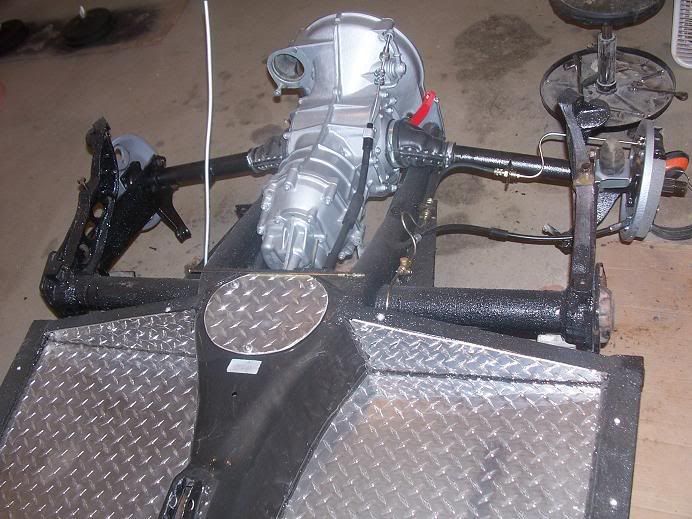
1.25" x 1" perimeter tubing with floors made up of cut down stock VW pan halfs.
I like the look of the VW pans, and I think it would be easier in a sense to put together. I can probably scrounge up some tubing, and then pick up pans at Buggy Warehouse in town. Option 1 would most definitely be stronger, but be more difficult and time time consuming to install. Quite a bit more hastle dealing with getting metal shipped to the shop and cutting it down and fitting it.. Price comes out in the wash
Thoughts?
Floors
Moderator: Ken
11 posts
• Page 1 of 1
Floors
![]() by Vee Dub Nut » 02 Mon Jun, 2008 10:10 pm
by Vee Dub Nut » 02 Mon Jun, 2008 10:10 pm
Fightin' Texas Aggie Class of 2006
1967 Beetle
19?? Buggy (Someday hopefully... unless I sell it too LOL)
2000 GTi
1967 Beetle
19?? Buggy (Someday hopefully... unless I sell it too LOL)
2000 GTi
- Vee Dub Nut
- Buggyholic
- Posts: 281
- Joined: 17 Mon Mar, 2008 6:21 pm
- Location: San Antonio, Tx
![]() by Texasbuggys » 03 Tue Jun, 2008 6:43 am
by Texasbuggys » 03 Tue Jun, 2008 6:43 am
Option one or two size would work, I would go with plate flooring, much stronger and will last longer.
Get your new short or long body, custom chassis, show cages, bumpers and accessories at http://www.texasbuggys.com
E-Mail Texasbuggys@suddenlink.net or call 361-218-6272
E-Mail Texasbuggys@suddenlink.net or call 361-218-6272
-

Texasbuggys - Buggyholic
- Posts: 1039
- Joined: 01 Sat Oct, 2005 9:30 pm
- Location: Victoria Texas
![]() by Don » 03 Tue Jun, 2008 7:18 am
by Don » 03 Tue Jun, 2008 7:18 am
Disclaimer: I've never actually done it myself.
Since your chassis is already shortened I think option 1 might actually be easier. From what I heard, shortening floor pans after the fact is a bear. That being said, I'm with you on the look of stock pans. Most guys here like a lot of mods, that's fine. For me, I like the nostalgia of a close to stock buggy. I'd like to think my buggy could have been built in the 60's or 70's. Then again, my buggy keep breaking down so what do I know.
Since your chassis is already shortened I think option 1 might actually be easier. From what I heard, shortening floor pans after the fact is a bear. That being said, I'm with you on the look of stock pans. Most guys here like a lot of mods, that's fine. For me, I like the nostalgia of a close to stock buggy. I'd like to think my buggy could have been built in the 60's or 70's. Then again, my buggy keep breaking down so what do I know.
1967 Dune Buggy - aka Shrek
-

Don - Buggy Nut
- Posts: 180
- Joined: 06 Mon Aug, 2007 7:55 pm
- Location: Pearland
![]() by jspbtown » 03 Tue Jun, 2008 9:53 am
by jspbtown » 03 Tue Jun, 2008 9:53 am
I used 1x2" steel for the periimter and 3/16 diamondplate floors. I got my material online at www.discountsteel.com for $260 shipped to Massachusetts. I think there is one in Texas so shipping or even pickup would be cheaper. They sell custom cut sizes so there was minimal waste (just enough for a shifter linkage cover and front plate). I welded a 3/4" angle onto the tube for the plate to sit on and trimmed the rear lip (where it rises up), off and added some 3/4" angle to make the floor perfectly flat. This adds leg room and imroves the seating. It was also tough as nails.


- jspbtown
- Buggyholic
- Posts: 250
- Joined: 26 Wed Dec, 2007 9:57 am
![]() by Bill K » 03 Tue Jun, 2008 10:58 am
by Bill K » 03 Tue Jun, 2008 10:58 am
As one who has done it (shorten stock pans) I would recommend option 1. I can tell you from experience, shortening pans is not an easy job if you want them to look half decent.
I used 1 x 1 box tubing for my outer frame, and put a plate under the foot area of the pans becase the pans just felt too flimsy in that area.
http://i28.photobucket.com/albums/c243/ ... e941e6.jpg
I know that if I build another buggy is will not be using shorten pans.
That's just my opinion, for what it's worth.
Dream It - Plan It - Build It
-

Bill K - Buggyholic
- Posts: 2172
- Joined: 06 Thu Oct, 2005 8:08 am
![]() by Vee Dub Nut » 03 Tue Jun, 2008 11:29 am
by Vee Dub Nut » 03 Tue Jun, 2008 11:29 am
Thanks folks.. Going to stick with option 1 which was my initial plan.
I talked to the steel company this morning and I'm just waiting for another order to come through for SwRI so my order can piggyback and get free delivery
Also scored some stainless tubing long enough for my fuel line from the old scrap pile behind the shop
*Hopefully* my order will come in this week or next.. otherwise it will end up being another two weeks after that, before I can work on it again. Need to make some progress
Fightin' Texas Aggie Class of 2006
1967 Beetle
19?? Buggy (Someday hopefully... unless I sell it too LOL)
2000 GTi
1967 Beetle
19?? Buggy (Someday hopefully... unless I sell it too LOL)
2000 GTi
- Vee Dub Nut
- Buggyholic
- Posts: 281
- Joined: 17 Mon Mar, 2008 6:21 pm
- Location: San Antonio, Tx
![]() by Vee Dub Nut » 03 Tue Jun, 2008 11:48 am
by Vee Dub Nut » 03 Tue Jun, 2008 11:48 am
CoryN wrote:I need to run a new stainless line as well. How do you intend to anchor it in the tunnel, or do you?
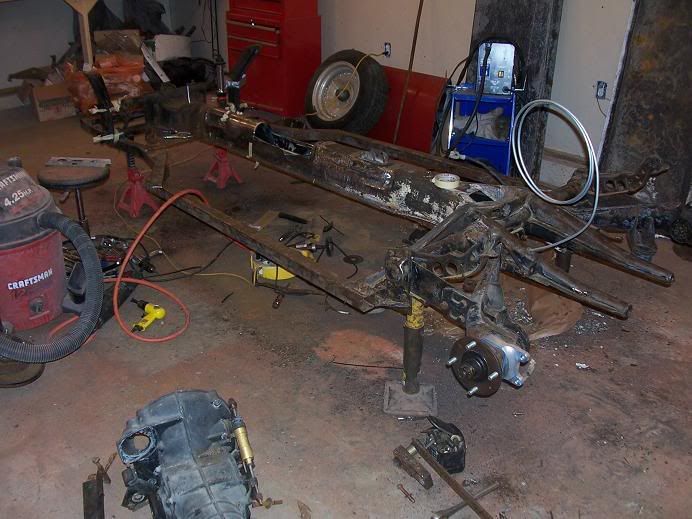
I'm going to run mine outside the tunnel. The fuel line that was in the tunnel was not in all that great of shape, and gave me a lot of trouble when shorting the chassis. I eventually got frustrated and ripped it all out. Figured I would run mine alongside the outside of the tunnel on the passengers side.
Fightin' Texas Aggie Class of 2006
1967 Beetle
19?? Buggy (Someday hopefully... unless I sell it too LOL)
2000 GTi
1967 Beetle
19?? Buggy (Someday hopefully... unless I sell it too LOL)
2000 GTi
- Vee Dub Nut
- Buggyholic
- Posts: 281
- Joined: 17 Mon Mar, 2008 6:21 pm
- Location: San Antonio, Tx
![]() by jspbtown » 03 Tue Jun, 2008 12:57 pm
by jspbtown » 03 Tue Jun, 2008 12:57 pm
I ran both my new fuel line and rear brake lines right under the center of the tunnel for my Manx. I used little rubber insulated clamps and riveted them to the underside. A healthy coating of Herculiner will ensure long life. And even if they don't last....then they will be VERY easy to replace. This made my floor pan look alot cleaner.
Of course if you plan off road then you may want to go another way.
For my newest project I ran the fuel line in the tunnel since I am relocating the shifter and e-brake. I wrapped small sections of rubber hose around the line and zip tied it inside the tunnel.
Of course if you plan off road then you may want to go another way.
For my newest project I ran the fuel line in the tunnel since I am relocating the shifter and e-brake. I wrapped small sections of rubber hose around the line and zip tied it inside the tunnel.
- jspbtown
- Buggyholic
- Posts: 250
- Joined: 26 Wed Dec, 2007 9:57 am
![]() by CoryN » 03 Tue Jun, 2008 12:59 pm
by CoryN » 03 Tue Jun, 2008 12:59 pm
mine sat with both ends exposed for 25 years, so I do not intend to use it. I'd like to run mine down the tunnel though, just for the clean look if I can figure out a good way to do it.
- CoryN
- Buggyholic
- Posts: 1108
- Joined: 30 Wed Jan, 2008 12:11 pm
- Location: McKinney, Texas
11 posts
• Page 1 of 1
Who is online
Users browsing this forum: No registered users and 57 guests