It has been a ton of fun and learning since then. Looking back, I should have been reaching out to you guys more. Seems like I have done most things at least twice, but that is how you learn stuff I guess…
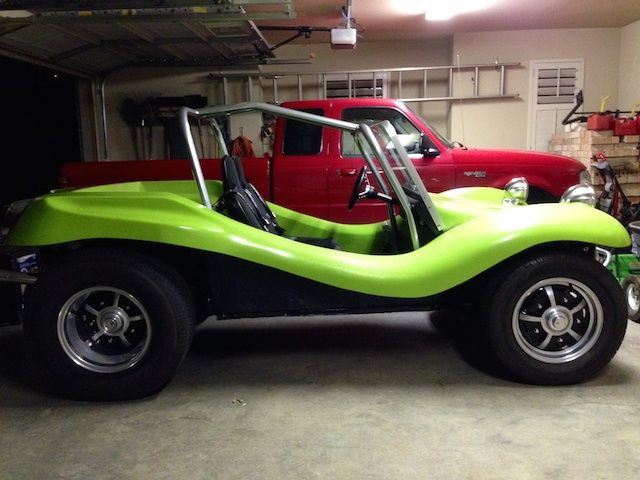
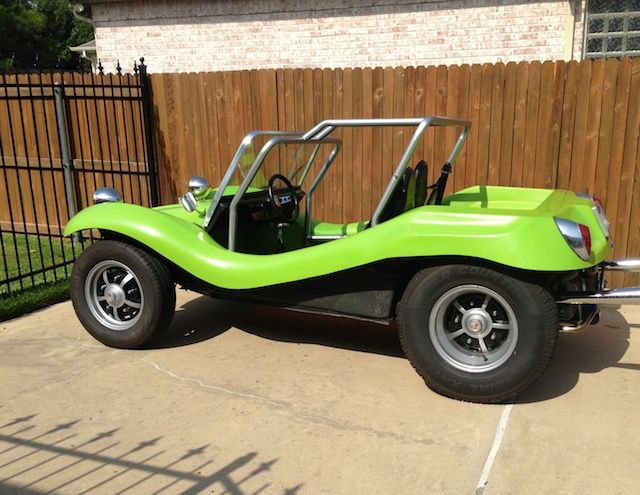
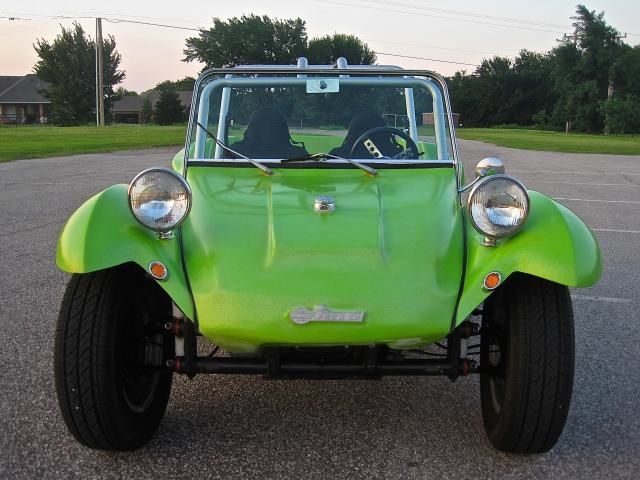
Particulars: 1968 EMPI Imp serial #506 built on a ’63 pan with 1776 motor. As you can see in the photo below, it was pretty much done when we purchased it, but there were a few things that needed to be sorted as well. I wouldn’t call it a “build” but we have made some repairs and tweaks. At the same time we have had the benefit of using it immediately i.e. running the wheels off every chance we get!!
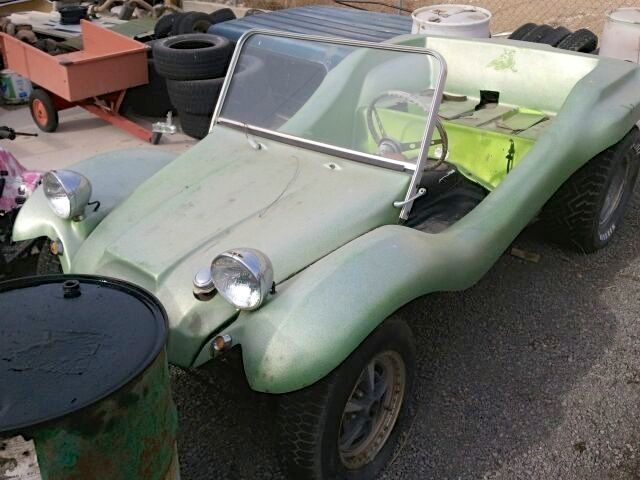
The prior build was done by a father and son in OKC in 2012 with the intent of trying to keep things as vintage as possible. They had it for over a year and sold it in order to buy a daily driver for the son after he got his license. He posted it on online and I was able to purchase and drive up to get it.
Here is what it looked like when we picked it up.
Picture before the build started by the prior owner.
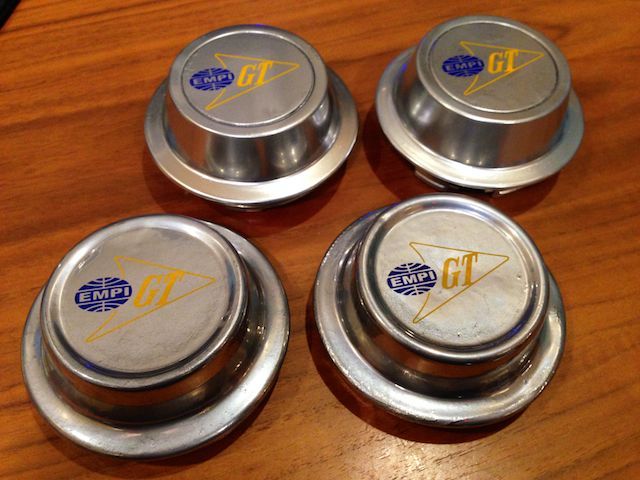
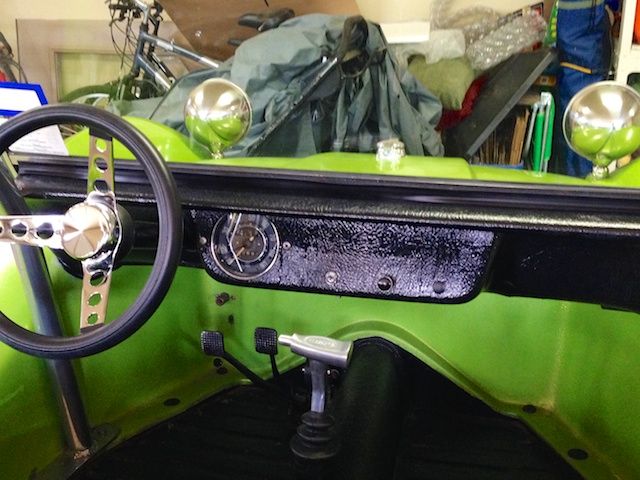
Some of things I really like about it – year-one body style with ID plate, solid body, spray liner floor, original Wide 5-spoke EMPI Sprint Stars in the back, clean and uncut dash, nice PRP seats, package shelf in back with map pocket and battery cover, original (and rare) front turn indicators, original Hella lenses in the back, etc.… (So basically, like just about everything. Haha!).
Opportunities to tweak it a bit – past electrical issues, a broken clutch cable, roll cage swap, adding bumpers, new seat belts – all done or in progress as described below.
Some pics of the “likes”.

One combo gauge, ignition switch and two knobs for wipers and lights. Floor switch for brights. Pretty simple.
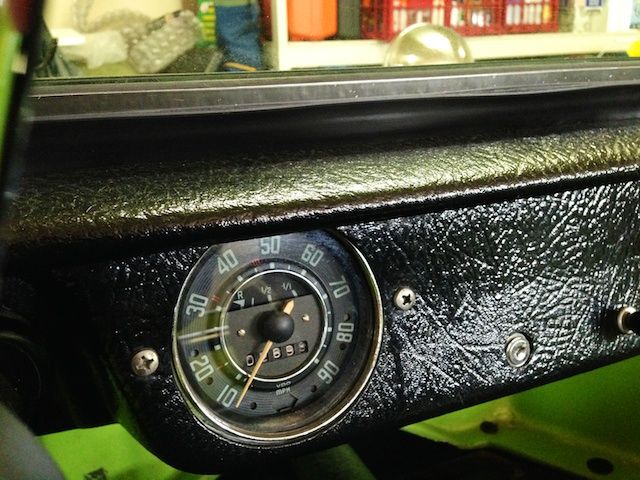
Speedo with built-in fuel gauge, alternator and oil pressure lights. Think this was a ‘68 style only.
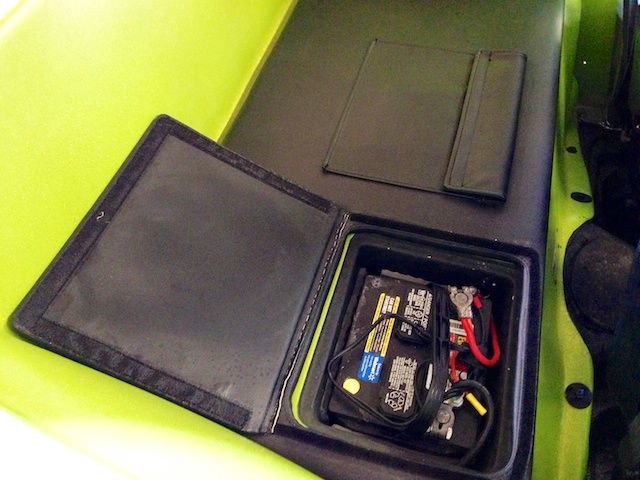
Rear shelf with map pocket (for POI etc.) and battery cover.
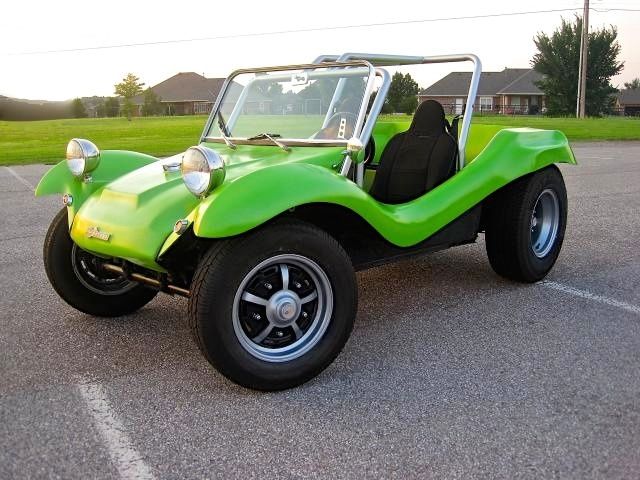
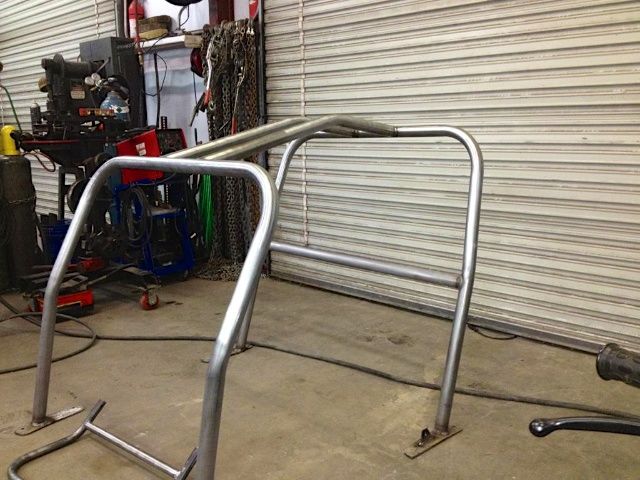
I started thinking about some modifications when the weather turned cold. First priority was to replace the roll cage. Original was 4-point with light gauge steel made in a muffler shop in OKC. As you can see in this picture the front hoop is too low and angled in toward the driver. I’m pretty tall, so this obstructed the forward view a lot. The extra bend in the rear hoop also not desired and would probably affect strength further.
The new cage was built with 1.75” OD steel and by a local fabricator recommend by Doug at Qualitat (Thanks Doug!!!). Good visibility now and is solid as a rock! Built on the original plates avoiding any new holes in the body with a tab for one end of the lap belt on each side. Powder coated chrome “like” color and cleared.
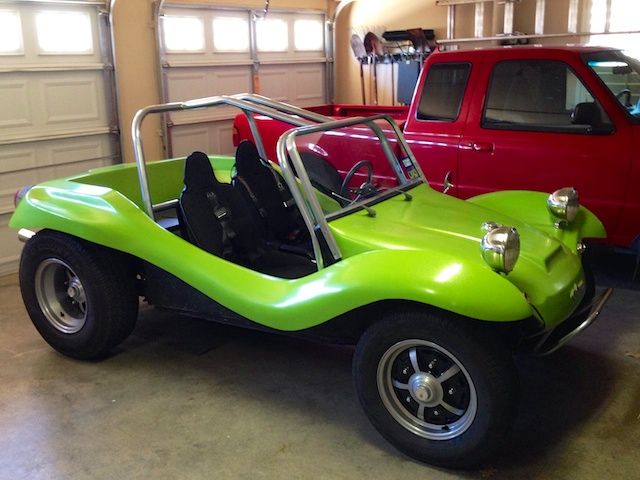
Front bumper was also added at the same time. Made to look like stock but narrowed so that the tow bar I own will still work. Really like the way it is bolted to larger tube welded to the beam. Will be easer to fix if messed up someday.
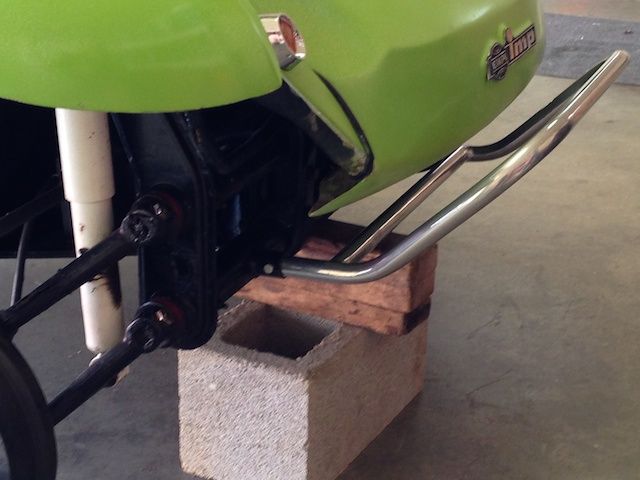
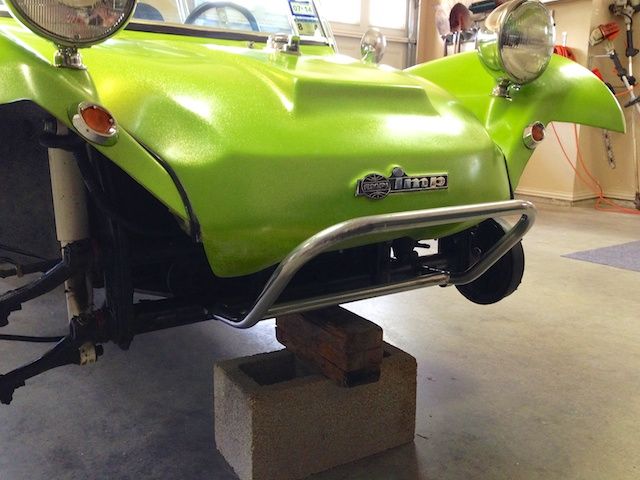
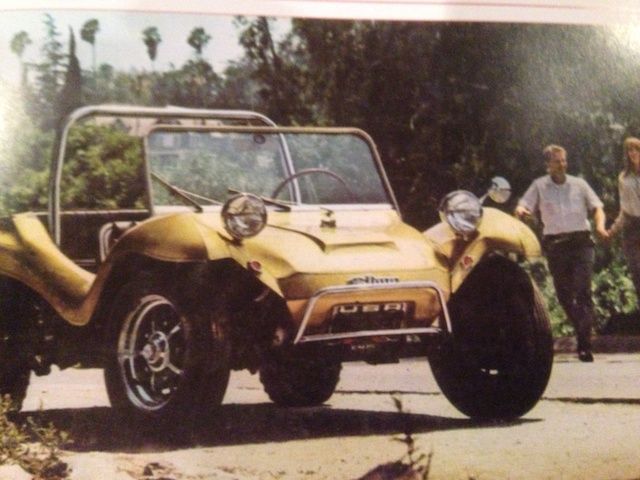
Below is what it would have looked like with the EMPI-supplied part back in the day, so reasonable likeness but not exact.
Next up, the seat belts. Originally it had 3-point belts with the shoulder strap connected to the back hoop. Besides not being comfortable for the wife or me, I didn’t really want to drill a hole into the bar and decided to look at harness options.
Settled on a compromise between a traditional 4 or 5-point and a typical automobile arrangement. They are 2" from Corbeau and look and work like a 4-point but is really 3 with the benefit of a inertia retractor in the back so you can get them on easily and can lean forward and move freely while strapped in. Just like a single shoulder strap, if you pull hard the brake kicks in.
Bolted to the floor with a heavy L bracket and plate under the pan to spread the load. Sent pictures to the manufacturer’s engineer to approve the installation, which he did but indicated it should not be done this way without the belt going over the crossbar (direct from floor to seat) due to potential spinal compression in a frontend collision.
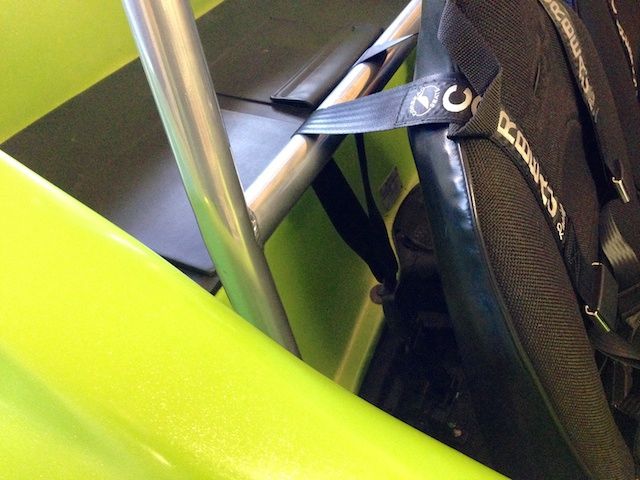
Retractor mount
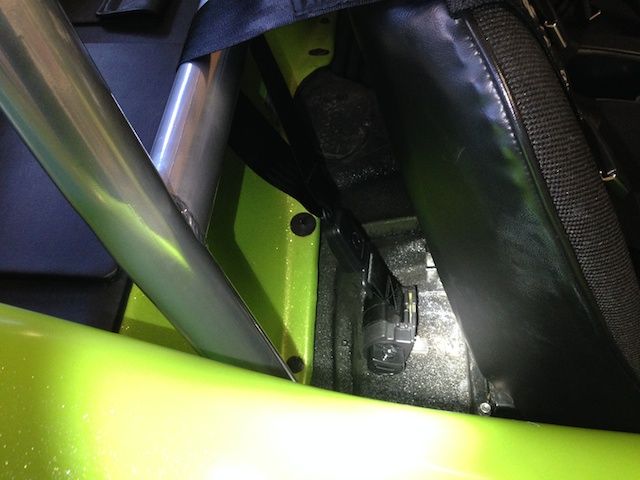
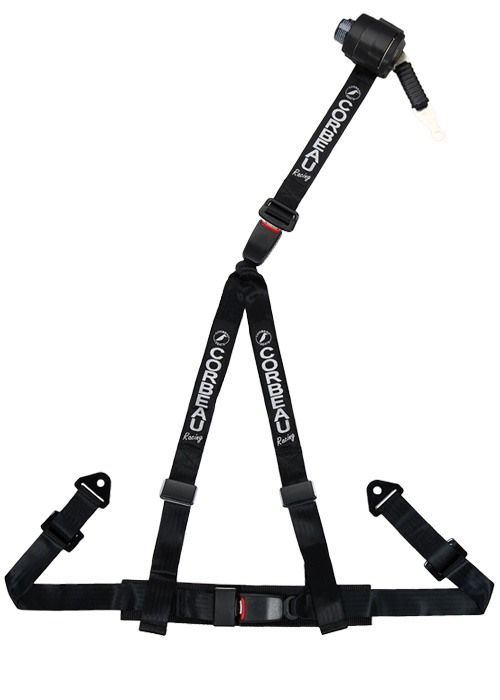
Above is what it looks like outside the car (if interested) and it can be unhooked from the retractor for maintenance, travel, etc. Note it DID NOT WORK when I tried to run the belts through the single shoulder slot in the center. The webbing is sewn into a Y above the retractor so it bunches up going through the slot, plus the slot is pretty tight so it wouldn’t retract smoothly. Worked out great since the PRP seats also had the shoulder loops, and one of my favorite mods thus far. Super comfortable.
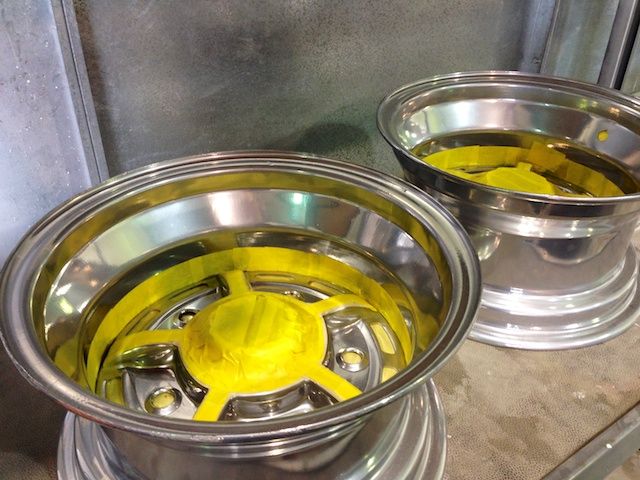
The current project is finishing up the wheels. They looked fine from a distance but a bit rough up close. Powder coat matched the old roll bar so coating and painting to match the new one. Had to do the fronts twice as they are alloy and not steel (like originals in the back) so they got pitted badly by the blaster. Took several weeks to strip, re-sand and then re-shoot, but now back and ready for the black overlay.
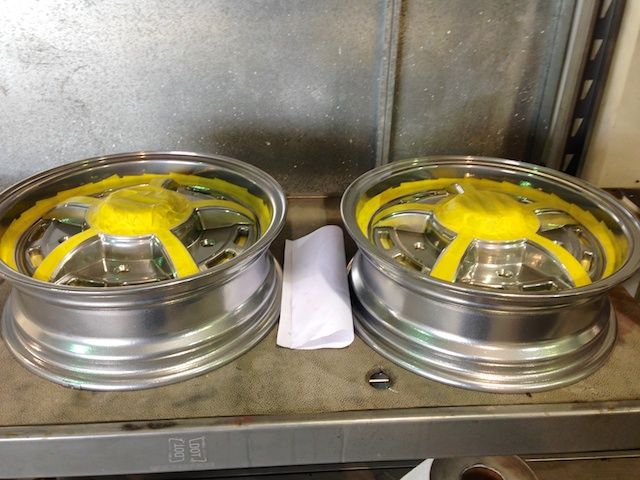
Will post a final picture once they are back on the buggy in the next couple days...
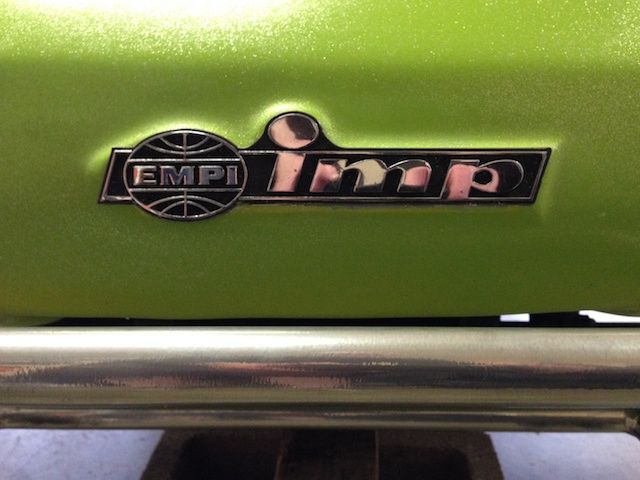
Lastly, was able to source a rare original emblem that matches the raised area on the front. Very nice example with original black paint; but rather pricey (as you can imagine and first I have seen for sale in any condition). There is one like it on the rear of the body, but it is scratched and no paint left. (Now off the vehicle and getting restored to look as nice as the front). Purely cosmetic I know, but you have to celebrate the small victories too, right?
Next small things are installing KYB gas assist shocks, steering shaft bearing (when it arrives) and skid plate.
So, just a week or so from wrapping up the winter projects, just in time for some buggy weather!
Regards.